
[This guest post was written by our friends over at UserPilot. Please check them out, and enjoy their post!]
You’ve gathered tons of feedback from your users and conducted experiments, but your users seem pretty uninterested in some of the new features your product team has developed flawlessly. Contrary to popular belief, this doesn’t imply issues with your features. This indicates that you need to step up your feature adoption efforts.
Getting your users to discover and start using advanced features isn’t as easy as you might think. By the time you’ve finished reading this post, you’ll understand:
But first, let’s talk about the basics..
In a nutshell, feature discovery and adoption mean that your product users “discover” the new feature and “adopt” it by starting to use the feature regularly.
In simple terms, feature adoption occurs when users start using specific features of your product regularly after finding out about them. You can get more value from your users if they get more value from your features. This helps you cut down your churn rates, making feature adoption a key factor in user retention.
All features aren’t created equal. There are primary features, and there are secondary ones.
Primary features are the ones that represent the core of your product. Without these features, users would get no value from your product. This is why you focus on encouraging users to adopt these features during the primary onboarding, as your goal is to help users reach the activation point.
The activation point is when the user understands and has experienced the value of your product. Users have to complete a series of actions to reach the activation point.
These actions vary depending on the user’s job-to-be-done and how your product helps them achieve it. Among other things, these actions include engagement with your product’s primary features.
For example, if your product is an email automation SaaS tool, primary features would include uploading a list of contacts, creating an email campaign flow, and sending the email campaign.
On the other hand, advanced features of your product are the ones that create extra value while using your product. Since these features aren’t key to your product, you focus on driving engagement and adoption of these features during secondary onboarding.

Primary feature adoption is crucial before getting to advanced feature adoption. After all, what use would users have of a more advanced feature if they didn't even adopt your product’s basic functionality?
For example, if your product is an invoicing software, you don't want users to learn how to create advanced reports before they learn how to create and send an invoice to a client.
Advanced features come with additional functionality. This means you can’t just blindly push them to users to drive adoption. Instead, you need to consider where the user is in their journey and focus on their needs at each stage.

If you want a feature to be fully adopted, it isn’t enough for your users to simply use it once. You can’t just sit back and track the feature adoption rate to understand how your product features are performing.
Justin Butlion, Founder of ProjectBI, developed a four-step framework to illustrate the feature adoption funnel.

Step 1 - Exposed: In the first step, you need to look at the number of users ‘exposed’ to a particular feature. This implies the number of users aware of the feature’s existence.
Step 2 - Activated: Next, you need to look at the number of “exposed” users who have actually tested or activated the feature.
Step 3 - Used: Then, you need to look at the percentage of activated users who proceed to use the feature.
Step 4 - Used Again: Finally, you need to track the repeated usage of the feature by users who have used it at least once.
Now that you’ve learned about the difference between primary and advanced features and how to measure adoption, let's look at best practices you can implement to start driving advanced feature adoption.
Checklists allow you to add tasks for users to complete during their journey to activation or other important milestones. They are becoming increasingly popular in the SaaS industry to help keep new signups on track.
While checklists are often just lists of tasks, a conditional checklist is one that is triggered only after the user has completed certain steps.To improve advanced features adoption, you can use a conditional checklist that triggers after the completion of the initial onboarding.
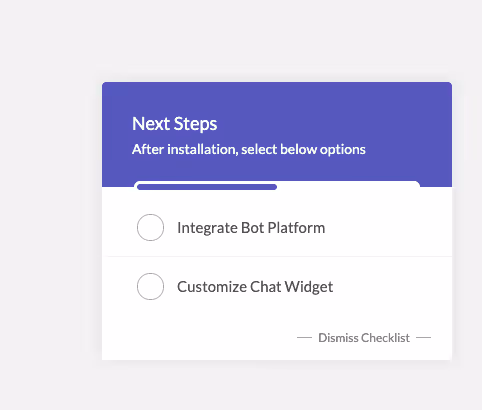
Including specific simple tasks in checklists for your existing users during onboarding can help you increase product adoption and feature engagement. For example, Kommunicate.io, a chat-based customer support SaaS, uses secondary onboarding checklists to fix their feature adoption issues.

After launching this checklist, chatbot integration rose from 40-45% to 55-60% for new users. They also introduced cues in the form of onboarding checklists in their product like the one below.
What do we learn from this? Checklists work not only for new users but also for your existing users. Using checklists in secondary onboarding can help you boost advanced feature adoption easily.
We have all come across product tours — guides that walk users through the entire product and show them all the features at once.
But here’s the problem: When users are done clicking “next,” they remember nothing.

This can be especially detrimental when you’re trying to increase advanced features adoption.
As we mentioned before, you can’t tell someone to jump to step 2 (engage with an advanced feature) before going through step 1 (primary onboarding and understanding the product's basic functionality).That’s where interactive walkthroughs come in.
These step-by-step, interactive guides help users understand a feature of your product. Each step in an interactive walkthrough is triggered only when the user has performed the previous one. This doesn’t mean just clicking “next” tirelessly.
Dumping a load of information on your users about how your features work isn’t leading them to use and adopt those features. You might as well hold the door for them to leave your app while you’re at it.
Understand that product tours don’t have feature adoption as an end goal. The lack of interaction during product tours means your audience isn’t engaging with your product and is less likely to remember any part of the tour.
On the other hand, interactive walkthroughs are entirely dependent on the actions of each user.This means the user is actively learning how to use the product. They are also taking actions to get the result they signed up for — leading them to adopt more features that are relevant to getting their job done.
If you want to add guidance at each step, you can use tooltips. Here's what one tooltip might look like. Notice how you can not only add instructions to make it easier for the user to take action; you can also highlight parts of the UI where the user needs to focus their attention.

You can also mix checklists with interactive walkthroughs. For example, add a step-by-step guide that triggers when a user clicks on a checklist task and tries to engage with a feature to complete the task. Then, trigger the interactive walkthrough to launch only for users who clicked on the checklist task and haven't engaged with the feature before.
If you are not custom coding this, try a tool like Userpilot, which has advanced segmentation options that allow you to display a walkthrough only to the desired user segment. Make sure you can segment by custom events and feature usage, and you'll be good to go.
Checklists and interactive walkthroughs have their perks. Using a checklist works when you are trying to push users to engage with multiple features, and interactive walkthroughs offer the necessary guidance to remove any friction in the feature adoption path.
But what do they have in common? Both require advanced segmentation if you want your messages to be relevant and contextual to your users.
Your ultimate goal is to cater to the needs of your users. When you focus on introducing just one feature, you want to make sure it will be relevant for the users you are introducing it to.
Hence, you need to segment your users based not only on who reached the activation point in the journey but also on which customer segment would benefit most from it. This will eventually increase the chances of users adopting your advanced features.
Segment your users based on:
Keep in mind that you need your product adoption tool to be equipped with segmentation features that allow you to segment by custom events and feature usage, at least.
You can then use these segments to personalize in-app experiences for each, increasing user engagement and feature adoption since you won't be prompting all users to try a new feature, only the relevant user segment for which the feature adds value.
With other tools like Candu.ai, you can even personalize your UI elements for each segment without involving your frontend developers. Highlighting elements in your UI directly prevents the annoying “tooltip overload” and can lead to further increase in feature adoption. Candu also helps you measure it in real time.
Here's a glimpse into building a segment based on different user identification criteria and custom events.

While you might be aware by now that getting users to adopt advanced features can be tricky, you have also learned how to make it happen with conditional checklists, interactive walkthroughs, and product analytics.
You now know that simply tracking feature adoption rate isn’t enough. You need to go through the four-step framework of the feature adoption funnel to dive deeper and drive repeated usage of features to consider them fully adopted. Once you do so, you’ll understand that the more engaged users are, the more likely they are to derive value from the advanced features that your team has worked so hard to develop.
Now that you're ready, you can get started designing tasks for your users with this template from Candu.


